ASP.NET Core 6: Creating API for CRUD Operations using EntityFrameworkCore (Basic for new ASP.NET Core Learners): Part 1
In this article, we will go through the steps for creating ASP.NET Core API. We use API aka REST
APIs for creating data communication services. In short, we can say that we are building a service that can be consumed (or subscribed to) by any client application e.g. JAVA, .NET, JavaScript Clients (like React, Angular, and Vue.js) so that these applications can make HTTP Requests and perform Data communication in JSON form. We can say the APIs can establish a data communication bridge between homogeneous or heterogeneous applications.
The ASP.NET Core is a complete eco-system that provides a single HTTP Pipeline for the following applications
- ASP.NET Core Razor Application
- ASP.NET Core MVC Application
- ASP.NET Core Web API Application
In this step-by-step post, we will use Visual Studio 2022 for creating the ASP.NET Core API project and SQL Server 2018 for the database.
The database scripts are provided in Listing 1.
Create Database Company
GO

CREATE TABLE [dbo].[Department](
	[DeptNo] [int] NOT NULL,
	[DeptName] [varchar](100) NOT NULL,
	[Capacity] [int] NOT NULL,
	[Location] [varchar](100) NOT NULL,
PRIMARY KEY CLUSTERED
(
	[DeptNo] ASC
)WITH (PAD_INDEX = OFF, STATISTICS_NORECOMPUTE = OFF, IGNORE_DUP_KEY = OFF,
	ALLOW_ROW_LOCKS = ON, ALLOW_PAGE_LOCKS = ON,
    OPTIMIZE_FOR_SEQUENTIAL_KEY = OFF) ON [PRIMARY]
) ON [PRIMARY]
GO

CREATE TABLE [dbo].[Employee](
	[EmpNo] [int] NOT NULL,
	[EmpName] [varchar](200) NOT NULL,
	[Designation] [varchar](200) NOT NULL,
	[Salary] [int] NOT NULL,
	[DeptNo] [int] NOT NULL,
PRIMARY KEY CLUSTERED
(
	[EmpNo] ASC
)WITH (PAD_INDEX = OFF, STATISTICS_NORECOMPUTE = OFF, IGNORE_DUP_KEY = OFF,
ALLOW_ROW_LOCKS = ON, ALLOW_PAGE_LOCKS = ON,
OPTIMIZE_FOR_SEQUENTIAL_KEY = OFF) ON [PRIMARY]
) ON [PRIMARY]
GO
Listing 1: Database Scripts
Step 1: Open Visual Studio and create a new ASP.NET Core Web API project as shown in Figure 1
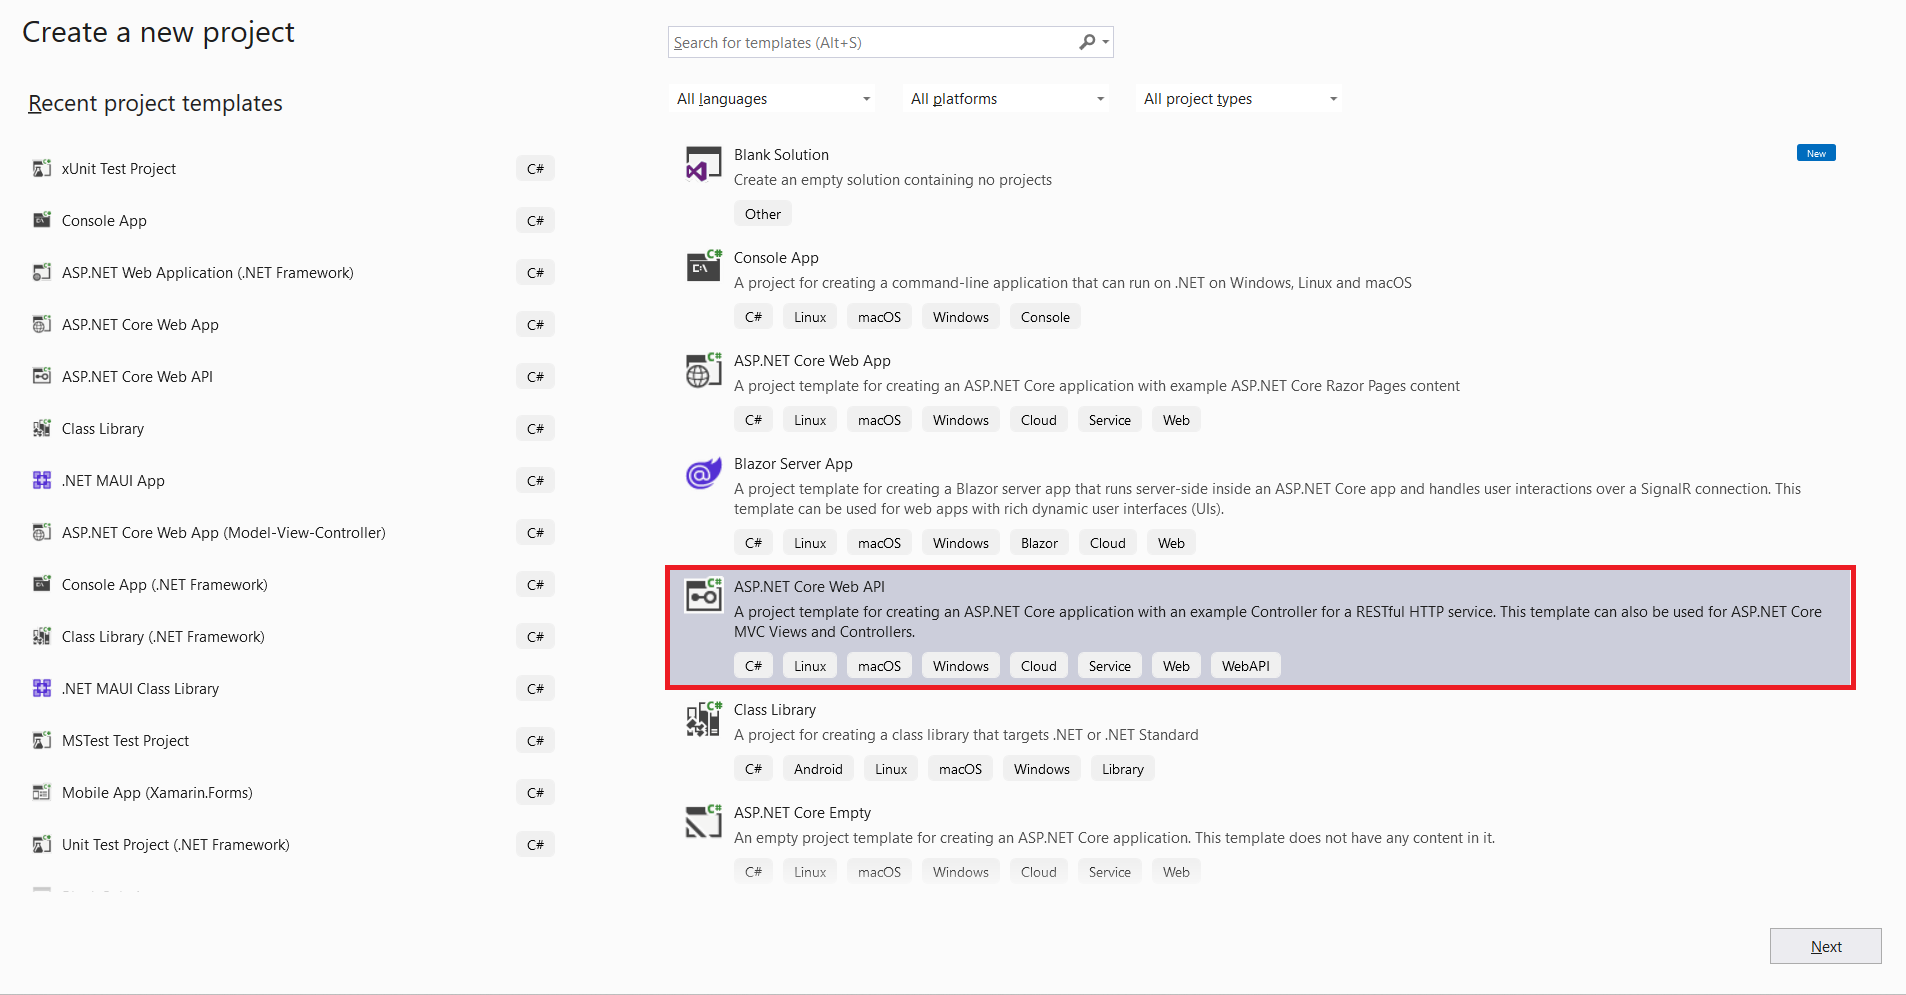
Figure 1: ASP.NET Core Web API Project
On this window, click on the Next button, here we need to enter the Project Name, and the location where the project will be stored. By default, the Solution Name is the same as the project name. Set the project name as Core_EFApi as shown in Figure 2

Figure 2: Setting the Project Name
On this window click on the Next button. The next window is the most important one. On this window, we need to select the Target Framework for the application. Here we will be selecting .NET 6 (.NET 7 is already out, you can select it as well). The next setting is the Authentication Type. These are the access security settings for our Web API. There are options available as None, Microsoft Identity Platform, and Windows. We will be selecting None as the Authentication Type. Then there are checkboxes provided where we need to Configure HTTPS access to the Web API (this is by default checked so keep it as it is). There is a check available for Docker support (keep it unchecked. The docker is out of scope for this article.). We have further checkboxes for the use of controllers in our Web API project. Keep this checked because we will be using Controllers classes for Web API creation. Also, keep the rest of the defaults on this window as it is as shown in Figure 3

Figure 3: Project creation settings
Click on the Create button. We have created a Web API project. The project structure is shown in Figure 4

Figure 4: ASP.NET Core Web API Project structure
In this project, we have the following important files and folder
- appsettings.json
- This file contains all application-level settings e.g. Connections string to the database, Loggine, etc.
- This is a JSON file and all settings in this file are provided using the Key: Value pair.
- Our API project reads settings from this file programmatically, which we will see in Part 2 of this post.
- Program.cs
- This is an entry point for the project.
- This file is responsible for following
- Hosting
- Services registration
- HTTP Pipeline configuration using the Middlewares
- Running the application so that it can be requested
- Controllers folder
- This folder contains all controller classes.
- These controllers contain the action methods that are accessed using HTTP requests for performing Read/Write Operations.
Step 2: Now we have created a Web API project. Open the appsettings.json file, this file contains some default settings for Logging, AllowedHosts, etc. We will modify this file by adding settings like database connection string in forthcoming steps. Open Program.cs file. This file contains some code by default as shown in Listing 2
var builder = WebApplication.CreateBuilder(args);

// Add services to the container.

builder.Services.AddControllers();
// Learn more about configuring Swagger/OpenAPI at https://aka.ms/aspnetcore/swashbuckle
builder.Services.AddEndpointsApiExplorer();
builder.Services.AddSwaggerGen();

var app = builder.Build();

// Configure the HTTP request pipeline.
if (app.Environment.IsDevelopment())
{
    app.UseSwagger();
    app.UseSwaggerUI();
}

app.UseHttpsRedirection();

app.UseAuthorization();

app.MapControllers();

app.Run();
Have a careful look at the code in Listing 2. The WebApplication class is used here that is used to configure HTTP Pipeline for handling the HTTP requests using routes. The CreateBuilder() method of this class returns an instance of WebApplicationBuilder class. This class has pre-configured defaults for the ASP.NET Core applications. The WebApplicationBuilder class contains the following important properties:
- Configuration
- This provides a collection of configuration providers. These are handled using the ConfigurationManager class. The WebApplicationBuilder class has the Configuration property of the type ConfigurationManager. This property is used to read JSON keys from appsettings.json file.
- Environment
- The Environment property of the type IWebHostEnvironment provides information about the web hosting environment where our application is running.
- Host
- The property Host of the type ConfigureHostBuilder is used for configuring host-specific properties.
- Logging
- The property Logging of the type ILoggingBuilder is used to configure a collection of logging providers for the application.
- Services
- The property Services of the type IServiceCollection is used to configure services for the application.
- These services are the various framework-provided services like Data Access, Authentication, Authorization, CORS, Identity configuration, Caching, Sessions, custom services, and many more.
- The ASP.NET Core provides a default Dependency Container for registering and managing dependencies. So that all application dependencies can be registered in the container managed by IServiceCollection using the IServiceProvider interface.
- The IServiceCollection interface implements the ICollection interface of the type ServiceDescriptor. This class is actually responsible to describe service types that are registered in the dependency container along with their lifetime.
- The service life can be Singleton, Scopped, or Transient.
- WebHost
- The WebHost property of the type ConfigureWebHostBuilder is used for configuring server-specific properties.
- This property is actually responsible for
- The Kestral server configuration
- Setting the content root for executable files, the compiled assemblies e.g. the .dll, and the content files like razor files.
- Logging configuration
- Services configurations