Azure Functions: Creating REST APIs using Azure Function with Node.js
In this article, we will implement Azure Functions using Node.js. Azure Functions is a serverless solution where we have to write less code and maintenance less infrastructure which saves cost. In this article, we will be using Node.js to design and develop Azure Function using Visual Studio and Azure Extension for Visual Studio Code.
Why Azure Functions?
The advantage of using the Azure Functions is the code is executed when an event is fired. Consider that when an HTTP request is received then only you want the code to be executed which will connect to the database server performing DB Operations. In this case, instead of having a dedicated server for running such an application, we can create an Azure Function that will execute the code based on the HTTP request, certainly, this will be more cost effective because instead of paying for the whole server we just pay for processing cost.
Please note that to try the code for this article, the Azure Subscription is required, please visit this link to subscribe for Microsoft Azure.
You need to install Visual Studio Code (VSCode) and Node.js on the developer machine. To use the Azure functions, the Azure Functions Core Tools must be installed on the machine. The VS Code must be having extensions Azure Functions extensions as shown in Figure 1

Figure 1: Azure Functions Extensions for VS Code
Step 1: To create Azure Fucntion go to Command Palette and select Azure Functions:Creare New Project as shown in figure 2

Figure 2: Create a new Azure Fucntion Project
Once the Create New Project option is selected, you need to choose the folder where the function is to be created. Once the folder is selected we need to select the language for creating function as shown in Figure 3

Figure 3: Selecting Language to create a function
Once the language is chosen we need to select the Trigger that will be responsible to execute the finction, since we will be creating REST APIs using Node.js, we need HTTP Trigger, so we will be selecting HTTPTrigger as shown in Figure 4

Figure 4: HttpTrigger
Finally, you can assign a function name in our case the functiton name MSHttpTrigger. Once the name is assigned, we need to select Authorization Level for the function as shown in Figure 5

Figure 5: Selecting AUthorization Level
We will be selecting Admin for the code of this article. The Authorization Level is required to access the function endpoint. The Admin means the master key is required to access the function endpoint, we can retrive this key from the Azure Portal when the function is deployed. The Anonymous means no key is required. The function means function specific key is required (this is default).
Once the function project is created, it will have the folder with same name as we have assigned while creating the function. Thie folder contains function.json file. This file defines functions binding e.g. AuthLevel, trigger type, HTTP methods etc. The runtime uses this config file to determine the events to monitor and how to pass data into and return data from a function execution. The Figure 6 shows the function.js

Figure 6: The function.json
We can change this file by adding addtional routing URLs to acces this function.
Step 2: Since we will be performing CRUD operations with SQL Server Database, we will have to create database using Azure SQL. The database is created using Azure Portal, using Home==> SQL Database as shown in Figure 7

Figure 7: Creating Azure SQL Database
The database is created with name Company with following table in it. Use the script provided in Listing 1 to create table
Create Table Department (
DeptNo int Primary Key,
DeptName varchar(100) Not Null,
Location varchar(100) Not Null,
Capacity int Not Null
)
Listing 1: Creating Department Table
Step 3: We will be using Node.js Sequelize ORM for connecting to the database, we need to install folloiwng packages for the Azure Function project. Open the Command Prompt or Terminal Window, navigate to the project folder and install packages as shown in commands shown in Listing 2
npm install -g sequelize sequelize-auto sequelize-cli mssql
npm install --save sequelize mssql tedious
Listing 2: Installation Commands
Step 4: To create JavaScript class from the Department table, run the command as shown in the Listing 3 from the Command Prompt
Listing 3: The Command
Once this commmand is executed successfully, the Models folder will be created in it and the Department.js file will be added into it. This file contains Department class. I have already written an article on using Sequelize with Node.js you can read it from this link.
Step 5: In the MSHttpTrigger folder add a new folder and name it as DataAccess. In this folder add a new file and name it as dal.js. In this file we will add the code for crerating CRUD operations on the Azure SQL Comopany database on its Department table. In this file add the code as shown in Listing 4
const tedious = require('tedious');
const {Sequelize,DataTypes,Model, ValidationError} = require('sequelize');
const path  =require('path');
const sequelize = new Sequelize('Company', 'maheshadmin', 'P@ssw0rd_',{
    host: 'msit001.database.windows.net',
    port:1433,
    dialect:'mssql',
    pool: {
        min:0,
        max:5,
        idle:10000
    },
    define:{
        timestamps:false
    }
});

sequelize.authenticate().then(authenticate =>{
    console.log('====================================');
    console.log('connected');
    console.log('====================================');
}, (error)=>{
 console.log('====================================');
 console.log('Error Occured');
 console.log('====================================');
});

const deptModel = require(path.join(__dirname, './../../Models/Department'))(sequelize,Sequelize.DataTypes);

class DeparmentDal {

    async getAllData(){

        await sequelize.sync({force:false}); // connect to database
        let rows =  await deptModel.findAll(); // return the resolverd data
        console.log(rows);
        if(rows){
            return  {
                statusMessage: 'Data is Read Successfully',
                rowCount:rows.length,
                rows:rows
            };
        }
        return  {
            statusMessage: 'Error Occured',
            errorDetails: error.message
        };
    }

    async getAllDataById(id){

        await sequelize.sync({force:false}); // connect to database
        let row =  await deptModel.findOne({where:{DeptNo:id}}); // return the resolverd data
        if(row){
            return  {
                statusMessage: 'Data is Read Successfully',
                rows:row
            } ;
        }
        return   {
            statusMessage: 'Error Occured',
            errorDetails: error.message
        };
    }

    async createRecord(dept){

        await sequelize.sync({force:false});

        let record =  await deptModel.create(dept)
        if(record){
            return  {
                    statusMessage: 'Record Added Successfully',
                    record:record
                };
        }

            return  {
                statusMessage: 'Error Occured',
                errorDetails: error.message
            };

    }

    async putDepartment(id, department){
        await sequelize.sync({force:false});

        let dept = await deptModel.update(department,{where:{deptno:parseInt(id)}});

        if(dept) {
            return  {message: `Record Updated Successfully`,
                data:JSON.stringify(dept)};
        }
        return {msg:'Some Error Occured in create'};
    }

    async deleteDepartment(id){
        await sequelize.sync({force:false});
        console.log(id);
        let result =
                await deptModel.destroy(
                {where:{DeptNo:parseInt(id)}});

        if(result) {
            return  {message:'Record Deleted Successfully',
                    data:result};
        }
        return {msg:'Some Error Occured in create'};
    }
}

module.exports = DeparmentDal;
Listing 4: The CRUD Operations
The Listing 4 contains code to connect to Azure SQL Database using Sequelize ORM. The class DepartmentDal contains methods to perform Get, Post, Put, and Delete operations.
Step 6: Modify the code in index.js to use the dal.js and perform CRUD operations based on the HTTP GET, POST, PUT, and DELETE requests as shown in Listing 5
const DepartmentDal = require('./DataAccess/dal');
module.exports = async function (context, req) {
    var id = context.bindingData.id;
    console.log(id);
    // create an instance
    let objDal = new DepartmentDal();
    var resp;
    if(req.method === "GET"){
        let id = req.params.id;
        if(!id){
            resp = await objDal.getAllData();
        }else{
            resp = await objDal.getAllDataById(id);
        }
    }
    if(req.method === "POST"){
        let dept = {
            DeptNo:req.body.DeptNo,
            DeptName:req.body.DeptName,
            Location:req.body.Location,
            Capacity:req.body.Capacity
        };
        console.log(JSON.stringify(dept));
        resp = await objDal.createRecord(dept);
    }
    if(req.method === "PUT"){
        let id = req.params.id;
        console.log(id);
        let dept = {
            DeptNo:req.body.DeptNo,
            DeptName:req.body.DeptName,
            Location:req.body.Location,
            Capacity:req.body.Capacity
        };
        console.log(JSON.stringify(dept));
        resp = await objDal.putDepartment(id,dept);
    }

    if(req.method === "DELETE"){
        let id = req.params.id;
        resp = await objDal.deleteDepartment(id);
    }
    context.res = {
        body: {
            body:resp
        }
    };
}
Listing 5: index.js modifications
The code in Listing 5, uses the DepartmentDal class instance and invoke its methods based on HTTP requests received by the function.
Step 7: Modify the function.js file to add routing for the HTTP methods as shown in Lisitng 6
{
  "bindings": [
    {
      "authLevel": "admin",
      "type": "httpTrigger",
      "direction": "in",
      "name": "req",
      "methods": [
        "get",
        "post",
        "put",
        "delete"
      ],
      "route":"dept/{id?}"
    },
    {
      "type": "http",
      "direction": "out",
      "name": "res"
    }
  ]

}
Lisitng 6: The Routing URLs in function.json
Since we have already install the Azure functions tools, we can run this function locally from the command prompt. Run the command as shown in Listing 7
func host start
Listing 7: Run the function loacally
The function will show the URL to request the function as shown in Figure 8

Figure 8: Running function locally
Copy the URL and using the Postman tool make the HTTP Requests, the HTTP GET request will show output as shown in the Figure 9 (Note: Make Sure that the Azure SQL Firewall settings must be completed to allow requests from your machine's IP address, otherwsie the connection will not be accepted.)

Figure 9: The HTTP GET Request
Likewise, other HTTP requests can be tested to make sure that the Azure Fucntion is running successfully.
So the function is successfully created locally, now we need to deploy this function on the Cloud. Visit back to the Azure portal and create a new Azure Function as shown in the Figure 10

Figure 10: Creating a new Azure Function
Note that we have selected the Runtime Stack as Node.js and the Version Selected 16 LTS. We can use this function to deploy the function project to the Azure Cloud using Visual Studio Code.
Step 8: From the VSCode select the Workspace from the installed Azure extension as shown in the Figure 11

Figure 11: Deploy the Azure function to Cloud
Once the option Deploy to Function App.. is selected, the VSCode show the window to select the Azure Subscription for deployment as shown in Figure 12

Figure 12: Select Subscrioption to deploye
Make sure that you select the subscription in which the Azure Fucntion created as showin in Figure 10. Once the subscription is selected, the Azure Function created in the portal will be displayed as shown in Figure 13

Figure 13: Select the Azure Function
Select this function and the deployment will be started. Once the deployment is completed, you can visit back to portal and under the nodejsfunctionhttp, you can see the MSHttpTrigger function deployed as shown in Figure 14
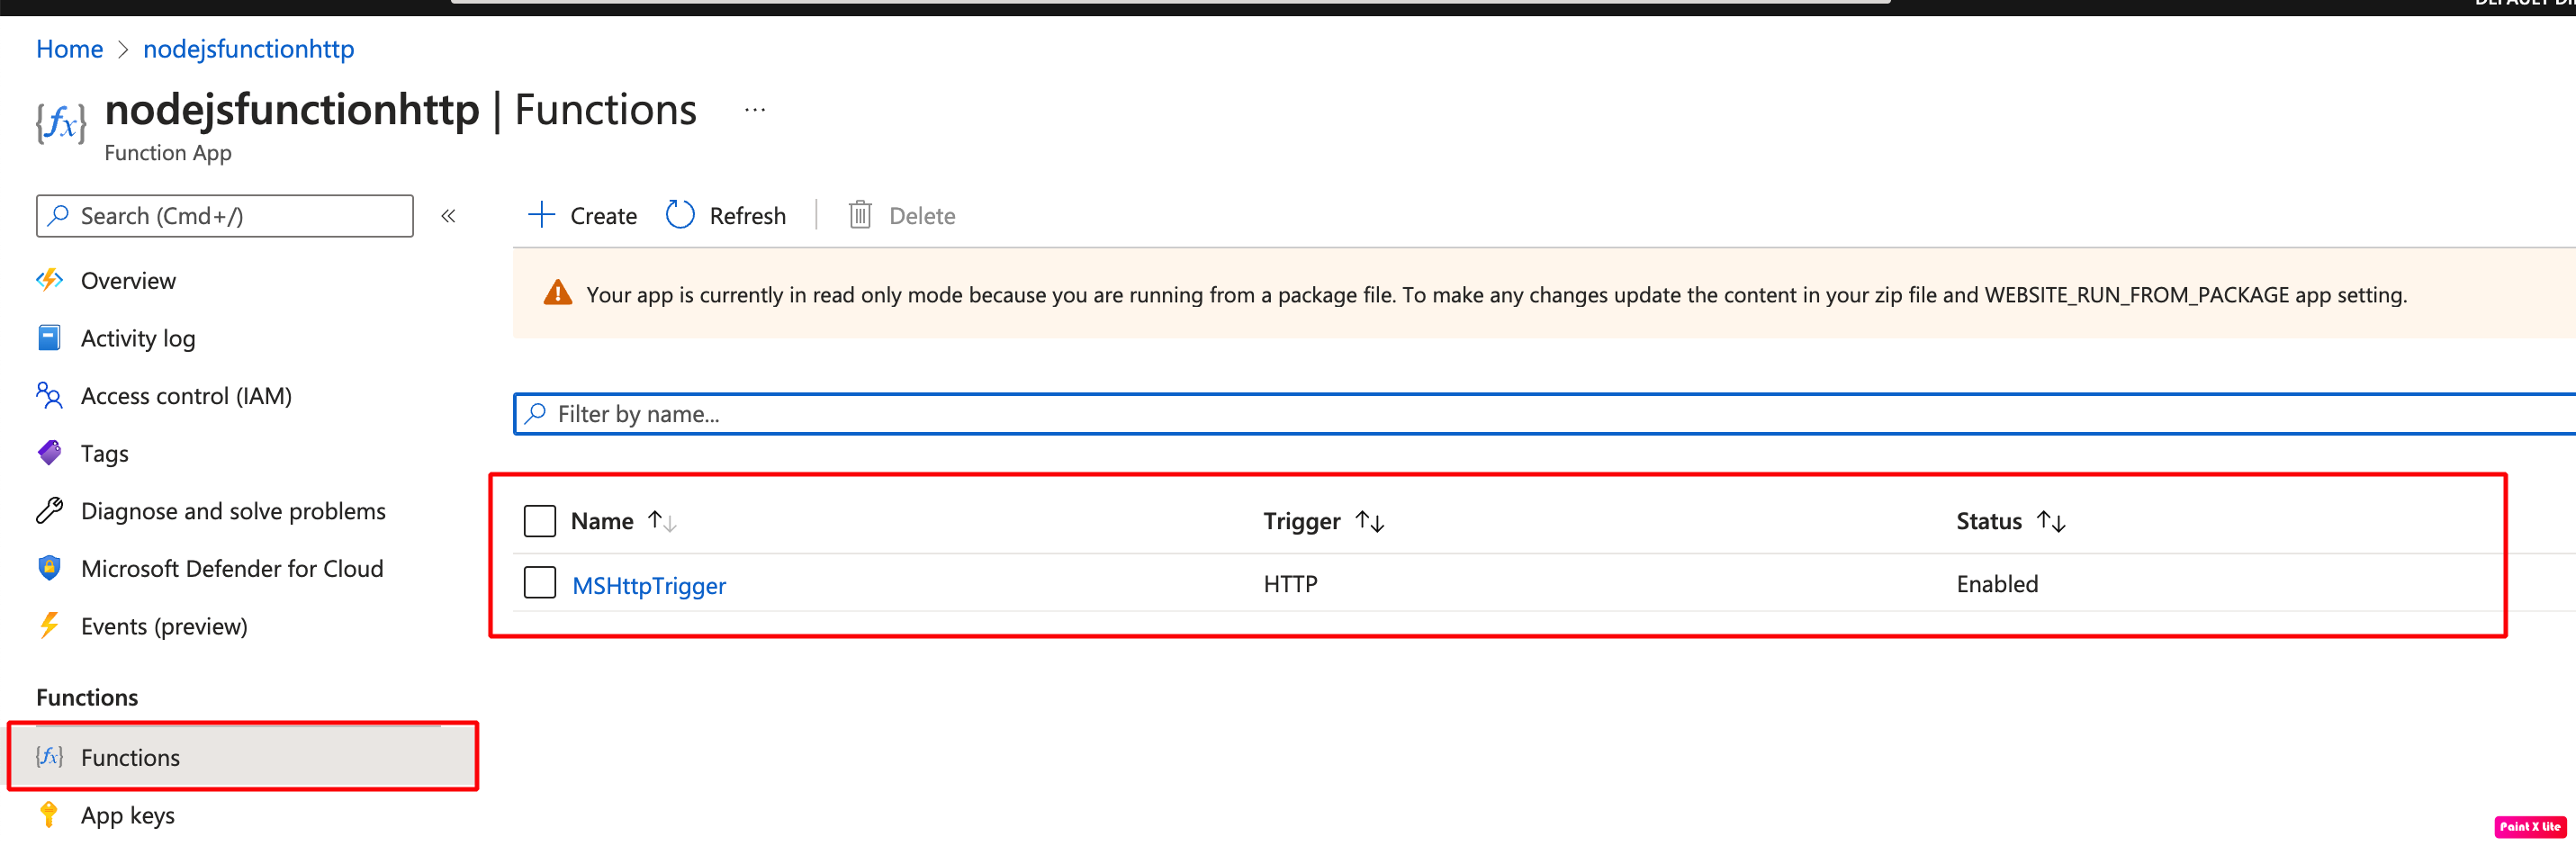
Figure 14: The Function Deployed
Now we can test this function in the portal alternatively this fucntion can be tested in the Postman, but to test the function from the Postman, we need the App Keys which we can copy as shown in the Figure 15

Figure 15: Selecting App Keys
Make sure that you copy the _master key. The Function URL can be coopied from the MSHttpTrigger function from the portsl as shown in Figure 16

Figure 16: Copy the Function URL
To test the Azure Function from the Postman, make a new GET request by using the URL copied as shown in Figuire 16 and Function App Key copied as shown in Figure 15 as shown in Figure 17
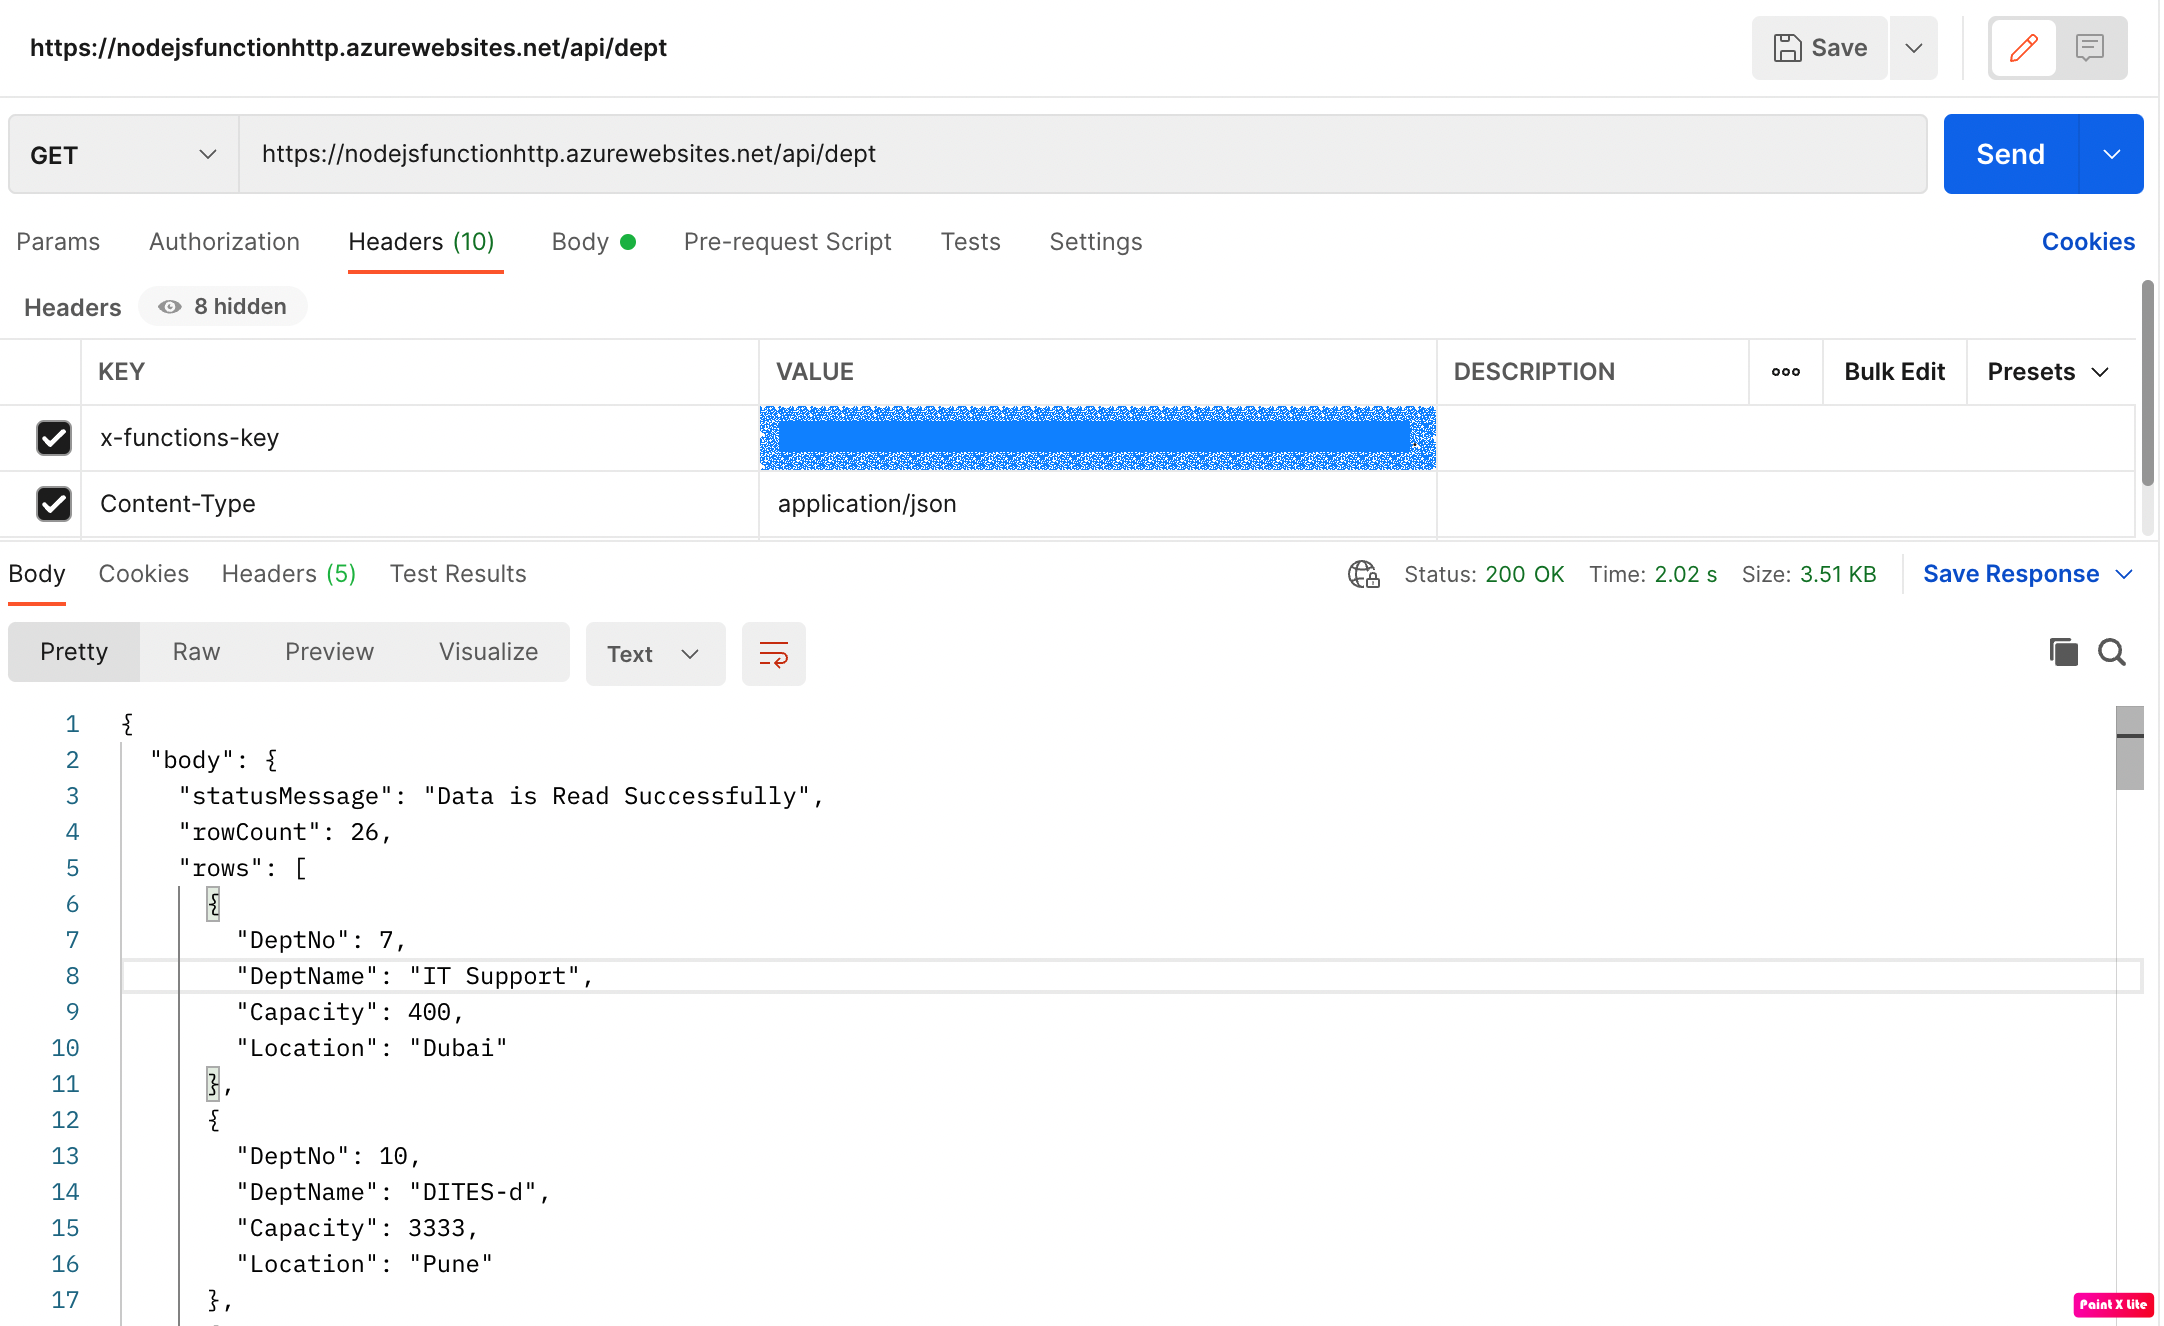
Figure 17: The GET Request to Azure Function using Postman
We need to send the Function AppKey using the Header parameter as shown in Figure 17. So we received data from Azure SQL using Azure Functions. Likewise, we can test HTTP POST, PUR, and DELETE requests.
The code for this article can be downloaded from here.
Conclusion: When using JavaScript FullStack application deployed on the Microsoft Azure, if you want to build REST APIs then creating Azure Functions usign Node.js is the best option available with us. We can use all cabilities of Azure Fucntions and use its as REST APIs which helps to save cost.


